Installing DIY solar panels can be a challenging but rewarding project. It requires time, effort, and a certain level of skill, especially in electrical wiring. Here’s a brief overview of what you might expect:
- Planning: You’ll need to spend time planning the layout and design of your solar array, as well as purchasing the necessary equipment.
- Physical Work: The installation process can be labor-intensive, involving lifting heavy panels and working at heights.
- Electrical Knowledge: A good understanding of electrical systems is crucial, as you’ll be dealing with wiring and connections.
- Time Commitment: Be prepared to dedicate several days or even weeks to complete the installation and research.
While DIY solar kits are available and can save you money on installation costs, it’s important to consider whether you have the necessary skills and time to commit to such a project. Additionally, professional installations may come with benefits like government schemes, product warranties, which you might miss out on with a DIY approach.
If you’re considering going off-grid or just want to reduce your carbon footprint and electricity bills, DIY solar can be a great option. Just make sure to weigh the pros and cons carefully before diving in as well as tools you will need. The skill set and requirements can differ based on the type of installation you are installing but I will try to cover some of these here.
Installing solar panels on the roof.
Installation solar panels on the roof requires a head for height, scaffolding. but before we get to this point we need to ensure that our roof is: safe, dry and in good shape and can take the extra load. you must comply with part P of the building regulations.
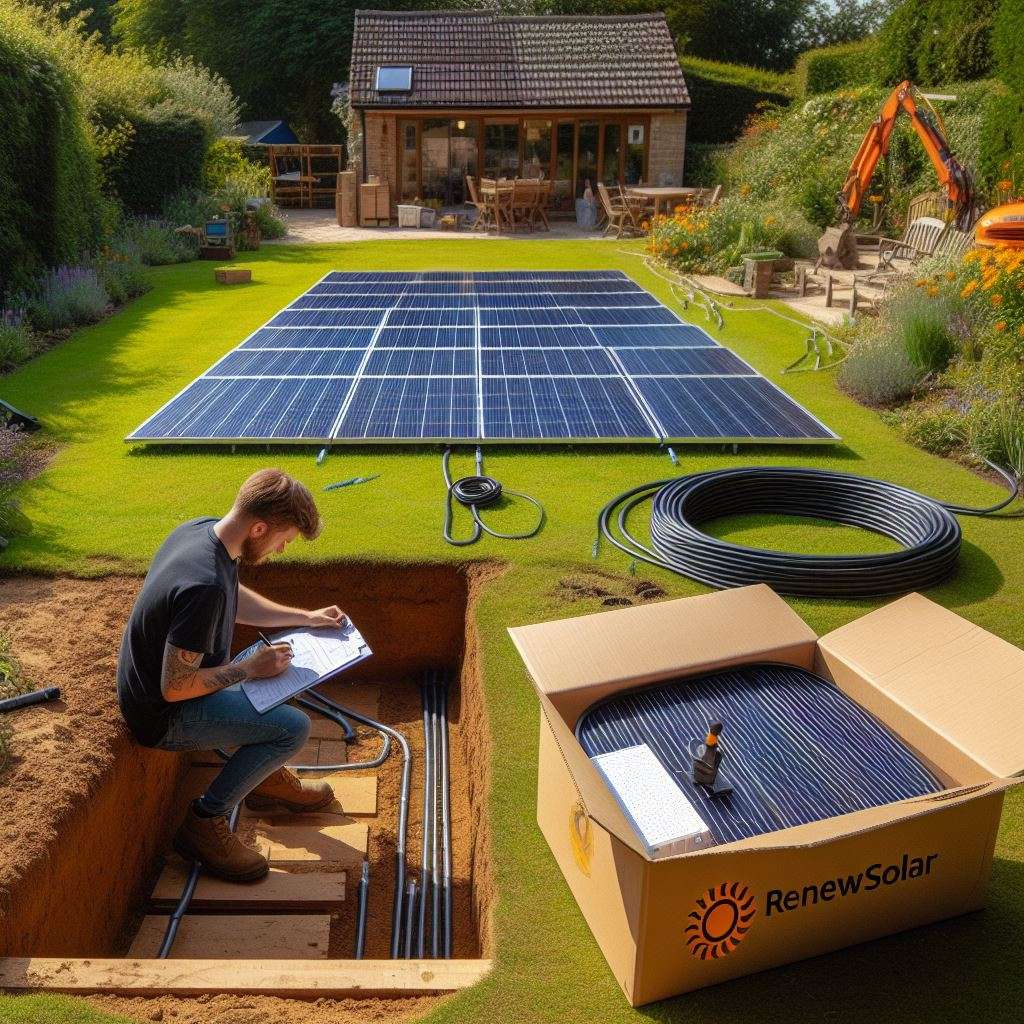
Installing a ground mount solar array.
Digging out footings can be hard work and you may need to use machines to get the footings. You are likely to require planning permission as the permitted development is very narrow. there are work arounds, such as covered walk way, pergola (solarpergola) and low laying roofs.
Flat roof solar.
This has to be one of the odd balls, as most people do not like flat roofs as they have had a bad name for decades, but for many putting solar on a flat roof is either tubs or non fixing array system. tubs can be expensive and “frame overlays” can look a bit ugly. we use a rubber foot base to attach the rails and to weight which comes in far more cost effective. again you need to know the roof can take the load.
it should be noted that the recent update to permitted development allows 1 meter rise in the panels, previously 20cm. but you need to consider wind, uplift, down force and weighting in all types of installation.
Fixings for the array come in the form of hooks for the roof with tiles. we have the rubber feet for flat roofs, there are clamps for metal roofs though there is also mini rails for these types too. you then have hangers which would be used for flat, or corrugated roof materials.

Hooks
Solar panel roof hooks are essential components for mounting solar panels on various roof types. Here are the different types of roof hooks you might encounter:
- Plain Tile Roof Hooks: Designed for plain tile roofs, these hooks can come with a rotatable cross connector or be height adjustable1.
- Pan Tile Roof Hooks: Suitable for pan tile roofs, available in portrait and landscape orientations to match the solar panel layout.
- Slate Roof Hooks: These are used for slate roofs and are typically pre-assembled with a rotatable cross connector.
- Metal Trapezoidal Roof Hooks: Ideal for commercial buildings with metal trapezoidal roofs, these hooks are secured to the ridges of the metal roof by self-tapping screws.
Each type of hook is designed to ensure a secure and stable installation while protecting the integrity of the roofing structure. It’s important to choose the right type of hook based on your specific roof type and the solar panel system you plan to install.
Mini rails are a type of solar panel mounting system designed for quick and easy installation on trapezoidal metal roofs. They are compact and lightweight, making them an efficient choice for supporting solar PV panels. Here’s a brief overview of their features:

- Optimized Design: Mini rails are engineered to span the trapezoidal box sections of metal roofs, which helps cut down on installation costs1.
- Versatility: They allow for easy changes in module orientation, accommodating both portrait and landscape layouts2.
- Elevation: Some mini rail systems, like the MiniFive, offer a 5° elevation, improving ventilation and solar irradiation, which can lead to increased energy yield2.
- Installation: The mini rail system typically requires fewer components, which simplifies storage and transport. It’s also designed for quick mounting, saving time during installation2.
These systems are suitable for a wide range of applications, from residential to commercial installations, and are particularly beneficial for large-scale solar deployments where efficiency and speed are crucial
The hardware.
We have already wrote about hardware calculations, battery and array performance in the articles in this website.. therefore we wont repeat ourselves. you will need to pick out all the hardware and items needed to make a “legal” installation.
Testing.
When commissioning a solar inverter in the UK, it’s essential to adhere to the Energy Networks Association (ENA) requirements. Here’s a checklist to guide you through the process:
- Coordinate Site Access:
- Ensure access to the solar array, inverters, AC equipment, and communications devices.
- Verify that everything is working as it should and communicating with the correct information.
- DC String Verification:
- Confirm that DC strings are properly terminated.
- Record the polarity of all strings and verify correct safety voltages.
- AC Conductors:
- Verify that AC conductors are correctly terminated.
- The voltage and resistance is correct
Remember to follow safety protocols and consult relevant ENA documents for detailed guidelines during the commissioning process. If you need further information, you can explore the ENA Document Catalogue
When preparing for the commissioning of solar power plants, several crucial steps fall under the pre-commissioning phase. Let’s summarize these essential activities:
- Pre-Construction Coordination:
- During the construction phase, pre-commissioning activities run in parallel with the final electro-mechanical works.
- The first blocks of the solar power plant are ready for pre-commissioning while other parts are still being erected1.
- Documentation and System Acceptance:
- Pre-commissioning involves necessary documentation processes required for system acceptance.
- It ensures that all relevant paperwork is in order before proceeding with the commissioning process
its worth mentioning that the ENA type test register, can place inverters and hardware on and off its list of approved hardware (Fully type tested) check here to ensure that what you have meets the requirement for GRID TIED systems.
Off grid requires a earth rod and proper grounding for your protection circuits. while watching videos online may help to some degree many are NOT UK compliant.
When it comes to off-grid solar installations, proper earthing arrangements are essential for safety and system performance. Here’s why:
- Safety Compliance:
- International safety standards mandate that all solar installations, including off-grid systems, must be earthed.
- If the solar panels are mounted on metal racks, it is a standard requirement to also earth the racks.
- Double Isolation of Solar Panels:
- Solar panels are double isolated, meaning they have built-in insulation to prevent electrical leakage.
- However, under special circumstances, such as specific system configurations or local regulations, earthing may still be necessary.
- AC and DC Sides:
- Earthing is done on both AC and DC sides of the system.
- On the AC side, the solar inverter is grounded to prevent current leakage and voltage fluctuations.
- On the DC side, earthing is provided on the mounting structures and through lightning arrestors.
Using this site search and forum, look into BS7671. which is the standard for wiring.
Ensure that your hardware is “approved” such as the DC isolators, as they tend to be the greatest cause of fires. you may cheap out on what looks like the same thing, but it could end in a puff of smoke.
Ensure that you over size cables and select the right fuses.
it’s worth noting that, like any other electrical system, there is a risk of fire associated with solar panels.
Here are some key points about solar panels and their potential fire hazards:
- How Solar Panels Work:
- Solar panels capture solar radiation from the sun and convert it into electricity.
- Photovoltaic (PV) systems consist of panels that convert sunlight into direct current (DC), which is then converted to alternating current (AC) using inverters for local use or export to the power grid.
- Some systems also include battery energy storage for use during periods without sunlight.
- Causes of Solar Panel Fires:
- Installation Faults: Poor installation is a common cause of solar panel malfunctions. Using an incompetent installer can lead to faults that may cause fires.
- Design Flaws: Design flaws in solar panels can contribute to fire hazards.
- Component Defects: Defects in components such as inverters, isolators, or wiring can pose fire risks.
- Environmental Factors: Extreme weather events (hail, lightning) or damage can lead to fires.
- Incorrect Seaming of Connectors: Improper seaming of connectors can cause arcing between conductors and the ground, leading to hot spots and potential ignition of nearby flammable materials.
- Recent Incidents:
- In the UK, there were 66 fires related to solar panels reported from January to July 2023, compared to 63 fires reported for the entire year of 2019.
- The growing reliance on solar energy highlights the importance of understanding fire risks and mitigating them.
While the risk of solar panel fires is extremely low, proper installation, maintenance, and adherence to safety guidelines are crucial to minimize any potential hazards.
SOLAR IS NOT MAINTENANCE FREE
it is a myth that solar is maintenance free.
Proper maintenance is crucial for ensuring the longevity and optimal performance of solar installations and your safety. Here are the usual maintenance requirements for solar systems:
- Regular Monitoring:
- Monitor your solar system periodically to detect any anomalies or performance issues.
- Use monitoring tools to track energy production, voltage, and system health.
- Visual Inspections:
- Conduct visual inspections to check for physical damage, loose connections, or signs of wear.
- Look out for debris, bird nests, or shading that might affect panel efficiency.
- Electrical Condition Testing:
- Regularly test the electrical condition of the system.
- Verify that all connections are secure and functioning correctly.
- Mechanical Checks:
- Inspect the mounting structure and ensure it is stable.
- Tighten bolts and fasteners if necessary.
- Panel Cleaning:
- Clean solar panels periodically to remove dirt, dust, and bird droppings.
- Use water and a soft brush or sponge to avoid damaging the panels.
- Fault Identification and Monitoring:
- Be vigilant about identifying and addressing system faults promptly.
- Monitor inverter performance and address any error codes.
- Safe Roof Access and Design:
- Ensure safe access to the roof for maintenance.
- Design the system with safety in mind, considering roof layout and fall protection.
Most fittings are an alloy which means that they expand and contract with heat, this can be weather or use. This can cause bolts and screws to come lost or snap. one of your tools should be a torque deceive, wrench or driver.
Faults for no reason at all. I have had this happen and don’t always bank on hardware working as it should. you should PLAN maintenance and testing on a regular basis.
Battery maintenance.
LFP with battery management may seem like it needs not work, that’s another myth. keeping on top of the required maintenance will ensure a longer life, and prevent failures or outages. the more batteries the more maintenance. thankfully most modern batteries would need yearly maintenance, lead acid should be checked every 6 months.
Battery maintenance is crucial for ensuring the longevity and optimal performance of solar installations. Let’s explore the key aspects of maintaining solar batteries:
- Cleaning Your Battery Regularly:
- Regularly clean your solar battery to prevent dust and dirt buildup, which can reduce its performance.
- Use a soft brush or cloth to remove debris from the battery surface and any cooling fans.
- Preventing Corrosion:
- Corrosion on the terminals is a common issue that can lead to performance loss.
- Inspect the battery connections and clean them if you notice any signs of corrosion.
- Coating Metal Components:
- Apply a commercial sealant or high-temperature grease to metal components.
- This helps protect against moisture and corrosion.
- Ensuring Tight Connections:
- Regularly check and tighten all battery connections.
- Loose connections can lead to inefficiencies and potential safety hazards.
- Regular System Monitoring:
- Use monitoring tools to track battery performance.
- Monitor charge levels, voltage, and overall health.
- Balance: system packs should be balanced as should pack cells, this is essential and can identify problems.
Maintaining a wet lead-acid battery is crucial to ensure it functions reliably and lasts for a long time. Here are some essential maintenance tips:
- Regular Inspection:
- Check the battery’s electrolyte level and top it off with distilled water as needed.
- Inspect the battery terminals for any signs of corrosion or damage.
- Avoid Overcharging and Undercharging:
- Both overcharging and undercharging can lead to reduced capacity and a shorter lifespan.
- Aim for a fully saturated charge lasting 14 to 16 hours periodically.
- If not possible, give the battery a fully saturated charge once every few weeks1.
- Operate at Moderate Temperatures:
- Avoid extreme temperatures that can impact battery performance.
- Moderate temperature conditions help prolong battery life.
- Ventilated charging: gasses should be vented as they are explosive.
Yes, during battery charging, certain gases are produced, and some of these gases can indeed be explosive. Let’s explore further:
- Hydrogen Gas:
- When excess current is passed through a battery during charging, water undergoes electrolysis.
- Electrolysis decomposes water into its constituent gases: hydrogen and oxygen.
- Hydrogen gas moves to the negative plate (cathode) and is liberated into the atmosphere.
- Hydrogen gas produced at room temperature and pressure is odorless, non-toxic, and colorless, but it is highly combustible.
- It will burn explosively in the presence of oxygen.
- A concentration level of 4% hydrogen is considered dangerous and can ignite with even a slight source of heat.
- To mitigate risks associated with hydrogen gas:
- Charge batteries in adequately ventilated rooms.
- Avoid naked flames, smoking, or sparking near charging batteries.
- Switch off the main power supply to the charger before connecting or disconnecting it from the battery.
- Use a degassing hose to release excess gases if possible.
- Always connect the charger to the battery before connecting it to the power supply.
- Oxygen Gas:
- During electrolysis, oxygen gas moves to the positive plate (anode) and is liberated.
- Oxygen gas is non-toxic, colorless, and odorless.
- However, when combined with hydrogen gas from the negative pole, it can burn explosively if the hydrogen concentration reaches 4%.
No responses yet